Archive
Monthly Archives: August 2018
Monthly Archives: August 2018

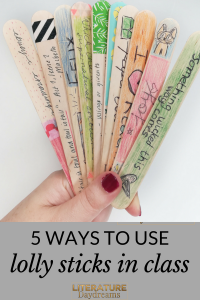
If you’re anything like me, you have drawers or even cupboards of things you have bought for your classroom – just in case. I have about one hundred thousand lolly sticks*. Over the last year, I worked hard to use all-the-things. In the post, I am going to share 5 ways you can use all those lolly sticks in your secondary classroom!
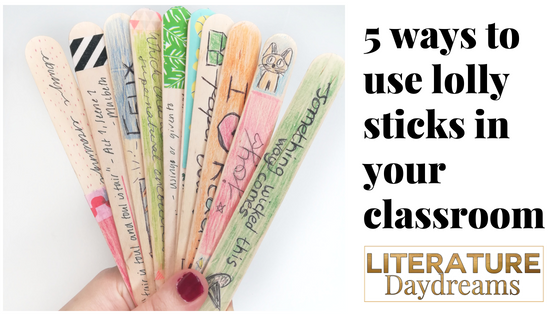
Lolly sticks originally made their way into our classroom as a form of assessment. We wrote our students names on them. Then used them as a simple, low-tech random name generator. Well, they are still great for that purpose. You don’t necessarily need to use them as part of your questioning strategy every lesson. But mix things up using them every now and again.
Hand out the lolly sticks to students at the beginning of the year. Set them a homework to decorate their lolly stick with their name and at least 2 images that show me something about their personality.
I stick them in a cup at the front my room and use them to:
So don’t discount using your lolly sticks for names still!
Another way I use lolly sticks is as bookmarks for our class novels. We generally don’t have enough copies of our class novels to allow students to sign them out and take them home. In fact, often our teachers are sharing class sets of novels between and we have to juggle who is using the books during hour 1, hour 2 etc. I also don’t see my classes every day. In fact, some of my classes are one hour a week classes and I don’t see them except for that one hour.
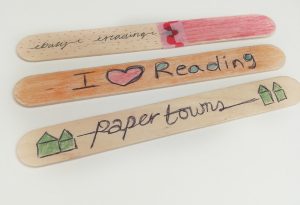
So, bookmarks are one of the things that make my reading teaching easier. I used to use post-it notes and to be honest that was fine. But my lolly stick bookmarks have a two-fold purpose: they make a great bookmark and they can be used as a reading ruler.
It’s an easy and effective way to keep everyone on track. No issues with different page numbers in different editions of the novel and an easy differentiation tool.
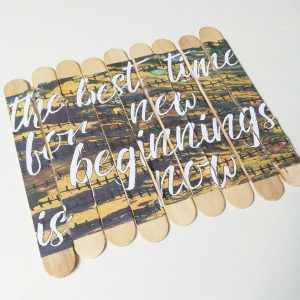
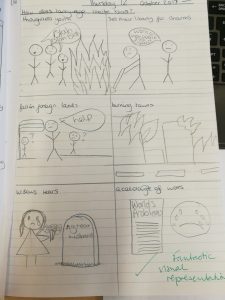
I also use them the most for extending and developing student responses to literature texts. Let’s take Macbeth for example. At some point early on in studying the text, I will hand out my unused lolly sticks to the students and ask them to write on them the names of characters, events, settings, themes, and relevant historical context facts. Once I have these I use them in a number of ways:
To take this further, I then start adding lolly sticks with key literary terms on (foreshadowing), with text-specific language (sycophant for example from Macbeth), or with essay writing challenge sentence starters (e.g. another way this could be interpreted is…).
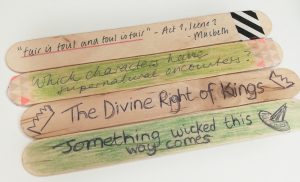
By the end of studying a literature text, I normally have about 150+ lolly sticks to use for any number of quick quizzes, revision tasks, or extension ideas. Even better, when I move onto a new text but want to spiral back to review Macbeth (for example) then I can just grab a lolly stick and ask the class a question.
Idea 4 is one that I use throughout the year and I use across multiple classes. Simply, anytime we find a new vocabulary word that we love (last year one class was obsessed with the word incredulous), we write it onto 2 – 3 lolly sticks and put them in our vocabulary post.
The final idea for using up all those lolly sticks is to create puzzles for your students to solve. These are great ice-breakers, quick fixes for when you need 5 minutes, or discussion prompts.
Here’s what I do:

I hope you enjoy using these ideas!
*This post contains affiliate links. If you buy something using one of these links, you won’t pay any more but I will receive a small commission!

Sign up below to receive regular emails from me jammed packed with ELA teaching tips, tricks and free resources. Also access my free resource library!

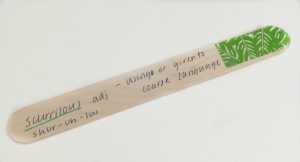
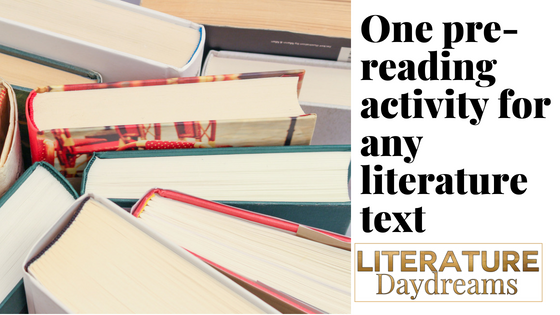
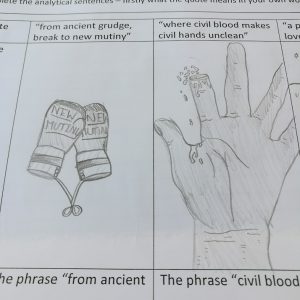
Helping students engage with and understand literature before they read is essential. One way to take the fear away from old-fashioned language or writing that is unfamiliar is to let students play with it before you read.
This pre-reading activity is deceptively simple. Here’s what you do:

It always amazes me how varied, interesting, and deep my students’ interpretations of these words are. Remember they have no idea what they are going to be reading. Yet students are able to see the depth in the language so much more easily when they only have a handful of words to deal with.
Here are a few examples of my student’s work: from Romeo and Juliet and the task above on The Drum!
If you try using this activity with your class, drop me a note in the comments to let me know how it went! You can see all my Literature resources here.
Sign up below to receive regular emails from me jammed packed with ELA teaching tips, tricks and free resources. Also access my free resource library!

As we get towards September, I know teaching Macbeth is just around the corner. Again. Please don’t misread me, I LOVE teaching Macbeth. It’s almost my favourite Shakespeare play to teach (see my post on teaching The Tempest).
I teach Macbeth every year and every year I find I l-o-v-e it all over again! In my class, there is no room for a quick trot through the play. My students all sit an examination on the play at the end of their 2 year English Literature qualification. We have to know the play and know it very well. Each year I try to add something new to my Macbeth armoury.
Here are 3 ideas that I used this year to take my teaching of Macbeth to the next level!

Raphael Holinshed was an English chronicler (similar to a historian today) and it is his chronicle of English history that was Shakespeare’s main source for the play Macbeth. Holinshed published two ‘complete histories of England, Scotland, and Ireland’ in the years 1577 and 1587. Each publication holds a large and comprehensive description of the history of these three nations.
Holinshed’s version of the story of Macbeth describes the reign of King Duncan and shows Macbeth to be a bloody dictator. It also included a woodcut illustration of the three witches that presents them more as nymphs or fairies, and less like the dark, genderless creatures in Shakespeare’s play. You can find out more about Holinshed and his chronicles here at the British Library site.
I have included resources for Holinshed’s history in my Macbeth unit on TpT. If you’re curious about what’s included you can find it here!
How do I use Holinshed in the classroom?
It is very simple, we have a short extract that we read directly from Holinshed (like the one below). We read it directly in Early Modern English (Elizabethan English) – you can talk to students, if you feel like it, about this transition moment in the English language. I love that Holinshed, like Shakespeare, shows both the old styles and new styles in his writing.

So somewhere around the end of Act 4 and the beginning of Act 5, we read a page from Holinshed, describing Macbeth’s later reign (remember Macbeth was actually King of Scotland for 17 years). We chuckle at the funny spelling and words.
Then we talk about the differences between Holinshed’s description of Macbeth and Shakespeare’s one. Holinshed generally comes out the winner because his presentation of Macbeth is bloodthirsty to the extreme.
After that, I ask my students to discuss the play by referencing Holinshed’s history. I might use sentence starters like:
The year that Shakespeare wrote Macbeth was a truly spectacular year for English culture and politics. Not only did London see the first performances of King Lear, Macbeth, and Antony & Cleopatra in that one year but England was rocked, almost constantly by political intrigue.
Let’s start with the obvious:
I have a long post already about how I teach Shakespeare meter and rhythm. You can read it here. I use many of the same strategies when I teach Macbeth, but I can never pass up the opportunity to add a little piece to my metrical teaching.
Here are a few ideas that I love in Macbeth:
If you’re curious to learn more about how to teach the meter and sound patterns in Shakespeare then do read my other blog post and download the free resource.
You can also see my complete Macbeth unit by clicking on the picture below:
Finally if you would like to receive free Literature and Writing teaching ideas straight to your inbox, then sign up below!
Sign up below to receive regular emails from me jammed packed with ELA teaching tips, tricks and free resources. Also access my free resource library!


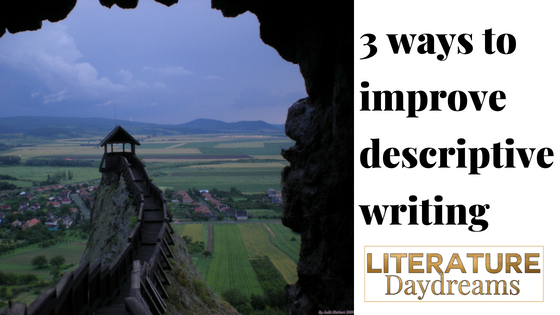
Writers can never get enough opportunities to write more detail. We live in the cracks on the pavement and the blank spaces between letters. Here are 3 quick writing activities that you can set your students to help them improve description and descriptive writing.
Here’s a quick-write task you can to practise the skill of ‘finding all the details‘. Choose one room in your house and list everything that can be: seen, smelt, heard, felt (and tasted). Write 100 words describing this room using only sensory imagery. When you have finished writing, ask yourself this question – were you able to create a sense of the room with this tightly controlled word count? If not, consider why? Look at your nouns and adjectives, are they specific and precise? Did you waste words? Make just 5 changes and see if this improves your writing.
Description isn’t always just about giving an accurate observation of something. Sometimes it’s about seeing it deeply. Perhaps we need to look into the heart of things before we can describe them well. Use these quick-write tasks to practise this skill:
Slow writing is the opposite of quick writing and quick writes. The idea is to write slowly, precisely, carefully, selecting each word intentionally. Slow writing can take 5 minutes with one sentence and 30 minutes with a paragraph.
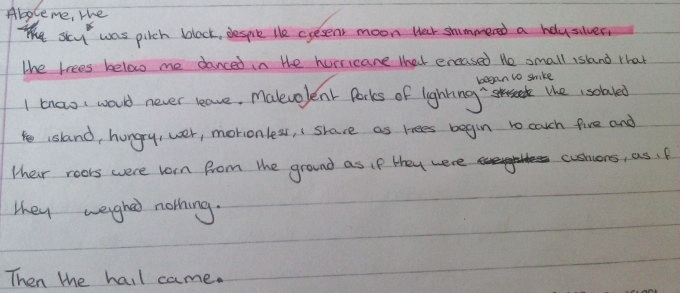
Imagine this scene: It is sunset and you are waiting for your friends, who are late. Describe the setting as the day moves towards darkness.
So how can you slow your writing down? you are waiting, probably bored, perhaps a bit annoyed. Now,
s-l-o-w your writing down, exactly like time seems to have slowed down while you are waiting. Walk your reader through the tick, tick, tick of your watch as you wait.
If you enjoyed these writing tasks and prompts then you should check out my writing prompt sets on TeachersPayTeachers. You can find them here.


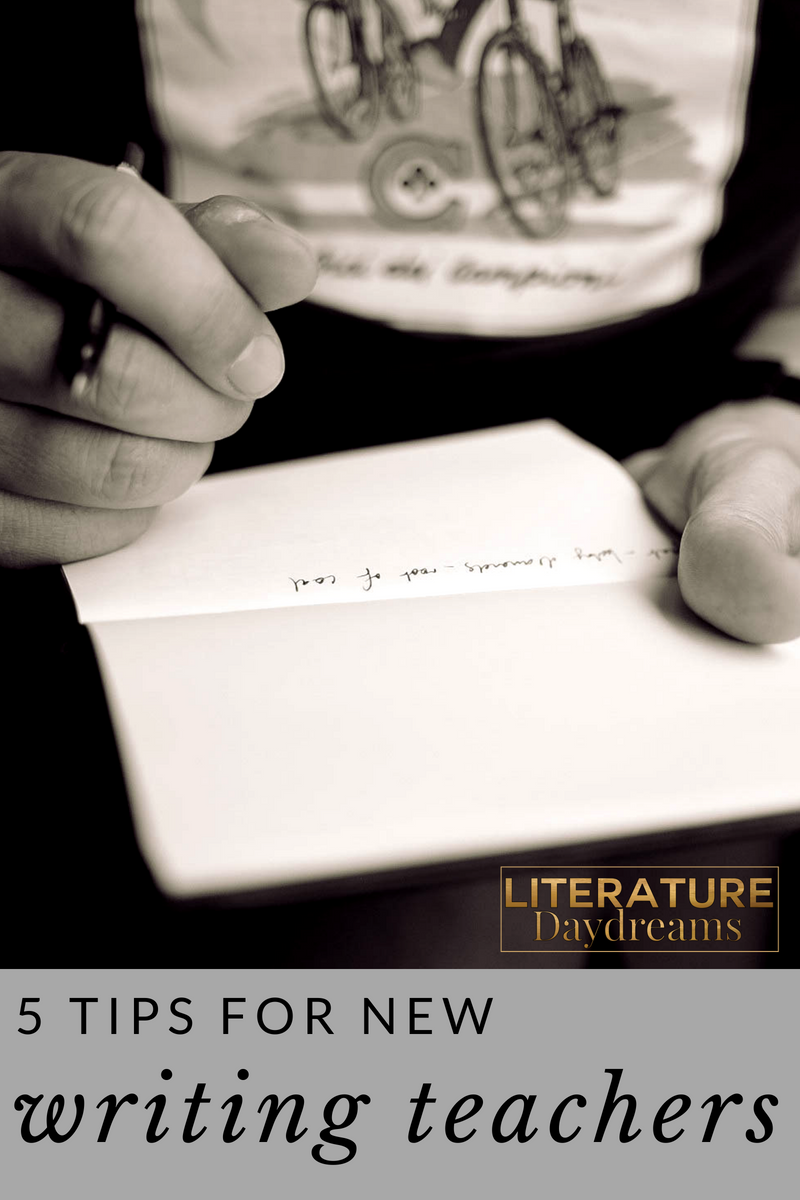
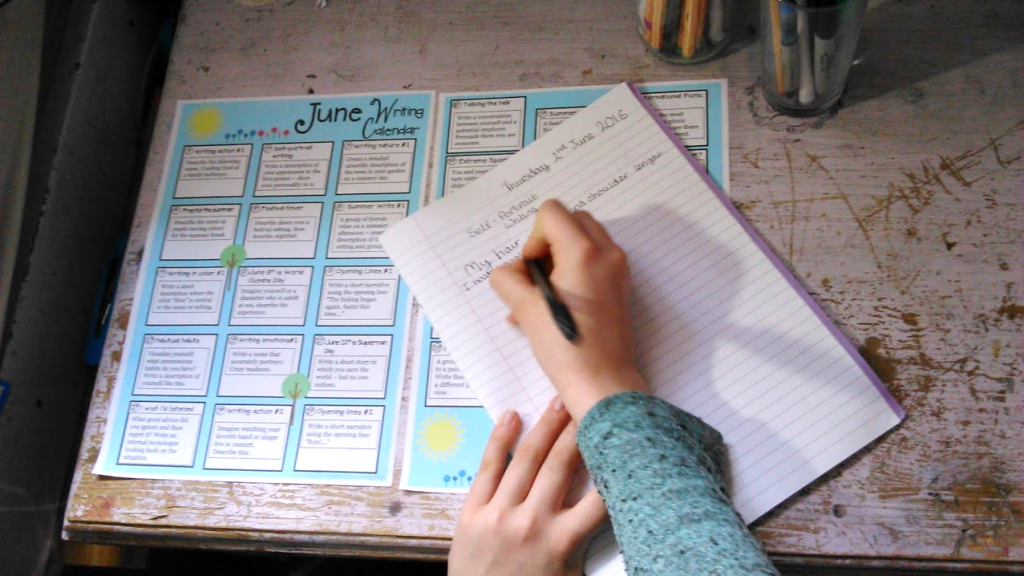
As we head back to school for another year of writing, I thought I would just take a minute to share my 5 top tips for teachers who are new to teaching writing.
I am a firm believer that if I want students to complete any writing task (small or large) then I need to do it first. Why? It’s the same reason why we read the text before we teach it. I need to know that the task I’ve set will achieve the outcome I’ve planned for. So rather than just project a picture of an elephant and say write a description. I write the description. The side-benefits of completing the tasks yourself are: you can create mentor texts that suit your students; it helps with pacing – writing ALWAYS takes longer than we think (doing the writing yourself proves this); it helps you understand the ‘in brain’ process your students will go through (so you can support them better when they get stuck); and it can help you spot with misconceptions and simple errors.
This sounds obvious, doesn’t it? But let me break it down why it’s important. There are so many skills that we teach and test for in writing. The technical aspects of grammar, spelling, sentence construction, dialogue. Then you have narrative structure, character creation, mood, atmosphere, action, resolution. Finally, there are things like word choice, punctuation, literary devices, genre writing. So, for every writing task you set – make sure you and your students are really clear on which of these (and all the others) you want them to focus on. Make it explicitly clear for them.

This tip goes hand in hand with number 2. Creative writing can be (and often is) as stressful and terrifying for students as essay writing. Even students who are readers often can’t see the creative thought process that results in a great story, so we need to show it all to them. That means actively teaching and then demonstrating narrative writing, story structure, character, description, action, dialogue, transitions, literary devices, paragraphing – the list goes on. Show your kids good examples, bad examples, how to fix mistakes, how powerful editing can be.
I don’t call these quick writes because I don’t want to unconsciously indicate that writing can and should be bashed out in 10 minutes. Even if that is the only time I can give a particular task. As all writing (whether it’s about practising sensational similes or creating complex characters) is about creating moments that the reader will remember, I use the term ‘miniature moments’. What are these exactly? Well, they can be anything you want. Lasting from 2 – 10 minutes, these activities are fantastic for focusing on a handful of key elements that contribute to a larger piece of writing. Say for example you will spend the lesson looking at descriptive writing – then your miniature moments could be: listing nouns, sourcing adjectives that add clarity, testing out metaphors, writing open lines, creating a 1-minute piece of dialogue. These miniature moments in themselves should all be compelling pieces of writing, but together that serves as great reminders of everything students need to remember!
I love miniature moments so much I created a 12-month writing calendar full of them! Have a look here if you are in the US or here if you are in the UK!
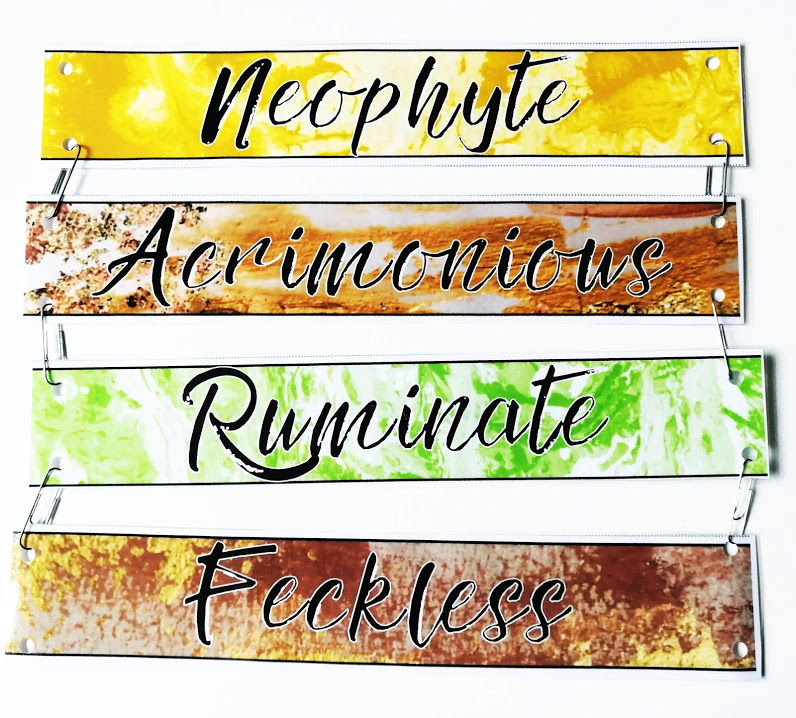
This might be my favourite tip. Whenever you read anything with your class – whether you are doing a writing unit or not – harvest vocabulary from the text. There are a couple of ways you can do this: 1) as you are reading together and come across a cool word, make a note of it; or 2) nominate a student or two to be in charge of writing down cool vocab as you are reading. Then I like to make a display of all of the words we’ve collected – this year we made this one. If you are curious about how I teach vocabulary in the classroom then check this out.
If you would like to hear more about teaching writing from me and would like to receive writing prompts and teaching ideas, please sign up for my weekly writing email below! If that wasn’t incentive enough – you will receive my FREE mini-guide for teaching descriptive writing!
*I send emails with teaching tips, tricks, and free resources to my subscribers regularly. I value your privacy and you can learn more about how I handle your data in our private policy. You can unsubscribe at any time.