Category Archives for "Collaboration"


Do you want your teenage students to be more active and engaged in group work? Well, this blog post has some group work gems. These activities are guaranteed to get your students moving, keep them engaged, and get them more involved in their learning!
This activity is exactly what the title suggests. You turn student teams into human photocopiers! They work in groups to create an exact copy of a document you give them. This is great for teaching new material, reviewing prior learning, or consolidating your current unit.

Before you begin, you will need to decide what you want your students to recreate. I usually create A3 sheets with information that I want my class to understand.
Each sheet needs to contain a mixture of images, labels, short phrases, and text written in long form. I don’t produce these to be beautiful (this is partly the point). They are often handwritten and my own drawings to make them a little more tricky to recreate!
Sometimes I give all the groups the same sheet to reproduce. Sometimes I give them different information sheets to reproduce and then teach the rest of the class (a bit of reciprocal teaching is always good)!
This activity is a great way to review information and ideas, as well as work on short/long memorisation of key knowledge.
This super-simple strategy helps you manage team or group work but with a twist! It creates a sense of competition and can help keep students on task.
It is really simple – just click to download this PowerPoint slide

Then set up your group or teamwork as you usually would. This time use the racehorses to track the progress of each team. The team that completes all the tasks first wins 20 pts (or whatever you choose).
I have made the file completely editable so you can adjust it to fit your classes. The clipart is royalty free.
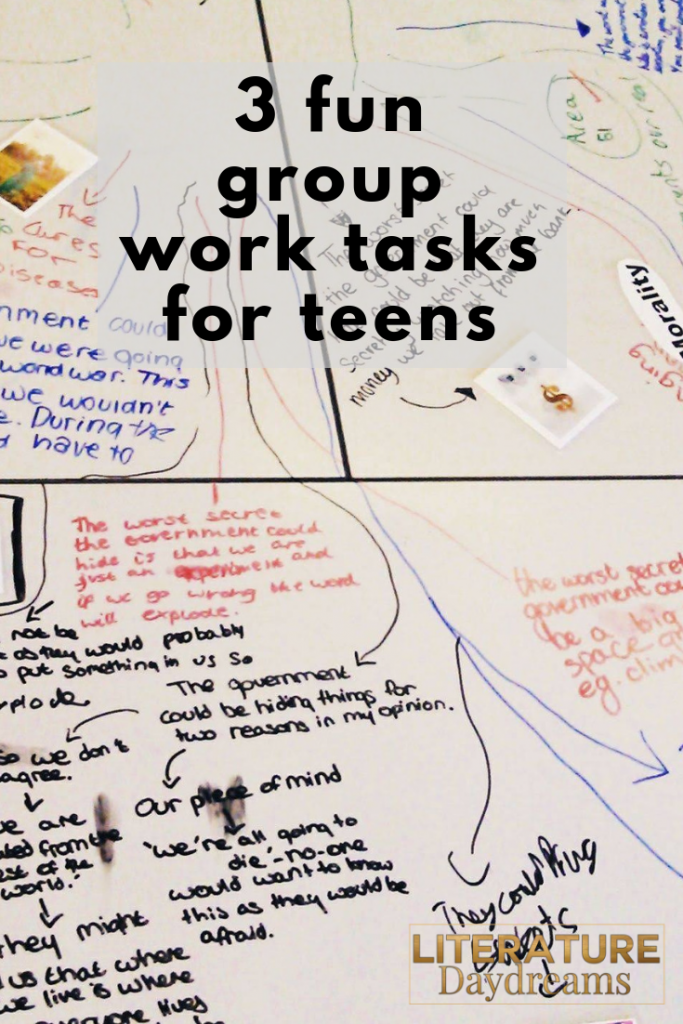
If you follow me on IG (please do!) – then you have probably seen me talking about the power of letting students write on your desks!
Yep, I said write on your desks. Of course, what I should have added was – with a dry-erase pen. This group work idea takes writing on the tables to another level. All you need to have to run this group work activity is dry erase pens for your students!
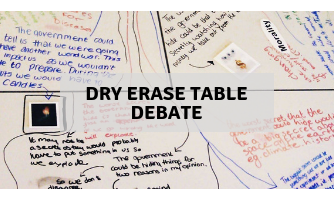
This is a really great strategy to use for classes who get distracted during group discussions, or where some students opt-out of participating (they can scribe). I just take a photo of the debate, quick print, and they stick in their notebooks!
Did you love these 3 group work ideas? I share teaching tips with my teacher-friends every Sunday via email. My “Making Sense on Sunday” email goes out each Sunday morning and it contains one classroom activity (like the ones above) and one activity to use with any reading or literature text. If you would like to hear my teaching tips first, then sign up below!

Sign up below to receive regular emails from me jammed packed with ELA teaching tips, tricks and free resources. Also access my free resource library!
")
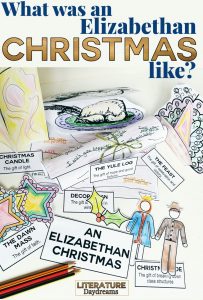
Engage and inspire your students this festive season by hosting an Elizabethan Christmas in your classroom. Don’t worry – no cooking required!
Interesting isn’t it?
Every time I teach a Shakespeare play – I find myself wondering “would they have done this in Elizabethan times?” My questions usually run to “did they play football?” (the answer is yes, it was called Gameball and was more violent than you can imagine) or “did they have oranges then?”(the answer is yes again, although only the very rich would have been able to afford them, they also had melons and pomegranates).
Last year in the run up to Christmas, I happened to be teaching a number of Shakespeare plays. By sheer luck my brain was stuffed full of the Elizabethans and so it wasn’t a surprise then when this question wormed its way in: “what was an Elizabethan Christmas like?”

If I had to sum up an Elizabethan Christmas in 3 words, I would choose: fun, collegial, symbolic.
Fun meant food and games and frivolity. The festive season for the Elizabethan was the moment in the year where the hard work of life ceased and every man, woman, and child celebrated the festival of mid-winter.
Collegial and shared celebrations were the norm for all. At this point of the year the rigidity of social class structures dissolved. Noble man and peasant would stand side by side to share in Christmas cheer.
Symbolism and ritual were also the hallmark of this season. The Christmas Candle, the Yule log, Wassailing, and the 7 course banquet all played a role in making Christmas truly spectacular period for the Elizabethans.
So how can you bring some Elizabethan fun into your classroom?
Read Thomas Tusser’s poem “Christmas Cheer” as an introduction to Elizabethan Christmas festivities and perhaps even study some Elizabethan Christmas Carols in your lessons.
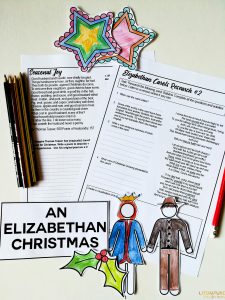 My “Host an Elizabethan Christmas” set includes Tusser’s poem along with other authentic texts describing an Elizabethan Christmas. It also includes 4 Elizabethan carols for your students to read, understand, and explain.
Create a beautiful Christmas community in your classroom with this fun and informative group work task. Here’s how it works:
In groups, students learn about the different elements of an Elizabethan Christmas (for example Christmas decorations, or the Yule Log). They then have 2 creative tasks to share with the class:
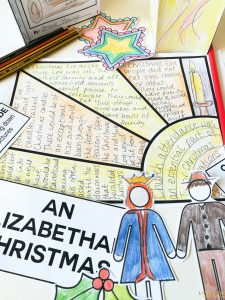
Everything you need to set up this group work activity is included in my Elizabethan Christmas pack. It is almost as easy as print and go (you just need scissors, glue, colors and you are done!)
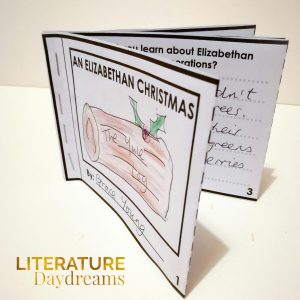
Once the groups have made their gifts, they can give a presentation covering what they have learned and this foldable mini-book is a great place for students to record their new knowledge.
This set also includes:
This fun and engaging set contains 3 days+ of activities and will bring some hilarity, joy, and a lot Christmas history into your classroom. Click here to go straight to this set.
")
I don’t know about you but I love Christmas. I love Christmas, like I love Shakespeare.
It’s a deep abiding love. The run-up to the holidays here in London is full of little traditions – today is Stir Up Sunday (which I have failed to do and so am behind already!), next week we have our Christmas Give Back collections at school, the Christmas concert, carol service, secret Santa. You name it, we do it.
And yet…every year the teens in my classroom moan and complain about everything Christmas (except the snacks). They love to hate it. They hate the music, they hate the decorations, the Christmas jumpers, buying presents, being nice. Scrooges and Grinches the lot of them. So each year I do 2 activities to combat these Scrooges of ELA.
No.1 color a card for someone at school and
No.2 write your own Christmas card poem.
These cards are super cool, the slick, modern designs appeal to our London teens. They aren’t interested in Christmas cottages or cuddly Santas. They want something modern, not traditional.


*I send emails with teaching tips, tricks, and free resources to my subscribers regularly. I value your privacy and you can learn more about how I handle your data in our private policy. You can unsubscribe at any time.

This review game is perfect to help your students demonstrate their learning for any literature text. You can use it while reading a text or after reading to have your students prove their learning.
In this blog post, I’ll show you:
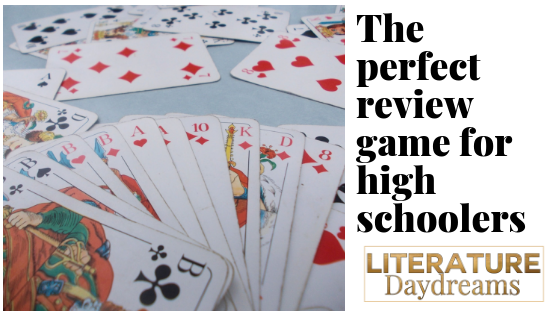
The basic idea is that students build a card tower. The catch is that each card on their card tower has to demonstrate their knowledge of the ideas, characters, and the plot of a text.
It would be too simple to build a card tower with just information on it. Nope – that’s not enough for us. Here’s what the key to the challenge is: Each card has a sticky note with information on it. But each sticky note has to link to every other sticky that it touches in the tower.
In the image below, each card in lower zigzag pattern touches. The cards that touch either at the top of the V or at the bottom of the V have to have information on that connects.
So the sticky that we can see on the lower level states “Macbeth does not experience guilt”. This means that the card propped up against it must link to that idea. Perhaps with a quotation that proves this, or a reference to an event that links to this idea.
Even more challenging – the cards that make the horizontal support across the lower level also have to contain facts and information that link the ideas on the cards!

The overwhelming benefit of this game is that students have to think and think hard about all the ideas they wish to demonstrate before they try and construct their card tower. The tower itself becomes secondary to their knowledge and learning.
As this is a literature review game. So your students will need to know about your text. It is essentially a 3D game of dominoes. Here are the instructions I give to my students:
The first time I use this review game, students get all caught up with what is and isn’t allowed. So I give them this example. Here’s is what a sticky notes series might look like from Macbeth Act 1, Sc 1:
Plot – Macbeth fights bravely against rebels trying to overthrow King Duncan –
which links to – Character – Macbeth is shown to be bloodthirsty and violent from the outset – which links to – Theme – The theme of rebellion is introduced as Macbeth is given the rebel’s thaneship – which links to…plot! But this time because the theme is rebellion – you could include anything from the plot on rebellion!

[social_warfare]
Sign up below to receive regular emails from me jammed packed with ELA teaching tips, tricks and free resources. Also access my free resource library!

I always need new ways to generate deep and thoughtful debate with my students. This one, is one of my favourites. This activity is called ‘Kill the Question’ and works as a quasi-CSI style lesson where students investigate a ‘question’ and decide whether to ‘kill’ it or ‘resurrect’ it.
My senior Literature class needed to prepare for an extended essay by reviewing some great philosophers. So prior to this lesson, students had worked in groups to research and present on a specific philosopher, or a period of history that saw some great advances in philosophical thinking.
Kill the Question is based on CSI, students gather evidence that enables us to debate on something more than opinion.
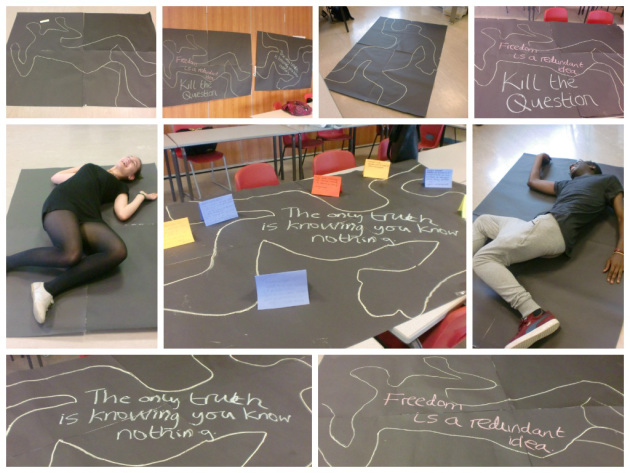
You can see from the image above that we “killed” two ideas: “the only truth is knowing you know nothing”, and “freedom is a redundant idea”.
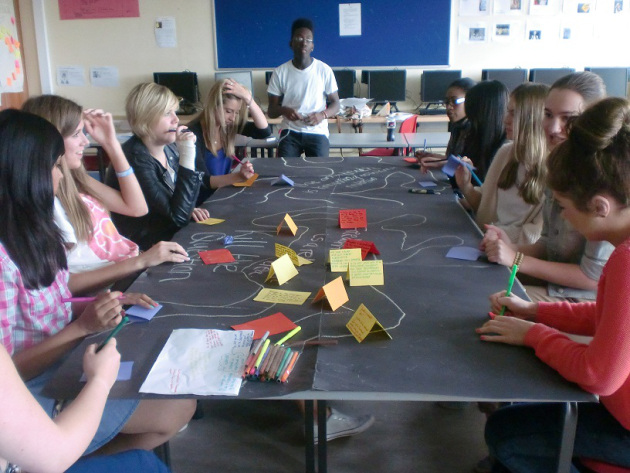
Once I had introduced the 2 ideas, students returned to their philosopher research groups. I allocated each group cards of a specific colour. They then used their prior presentation work to create evidence for or against this idea.
The students’ evidence was placed around the idea. We then debated it from the standpoint of each philosopher, what they might say to “kill” or indeed “resurrect” this idea.
I found that my students were able to make extended comments because they had prepared. But more importantly, they were able to tackle with the nuances and subtleties in each idea. They weren’t just talking out of their own experience or their own opinion.
It was then that I realised I wanted to try this activity with my younger pupils.
Speaking and listening is no longer a tested skill for us, but it is so important to develop thinking (and communication) skills. I thought Kill the Question would also be a great way to get my students thinking in more depth about a novel.
After all, think of the connections that students could make – links to themes, character and setting, links to context, links to other texts and writers.
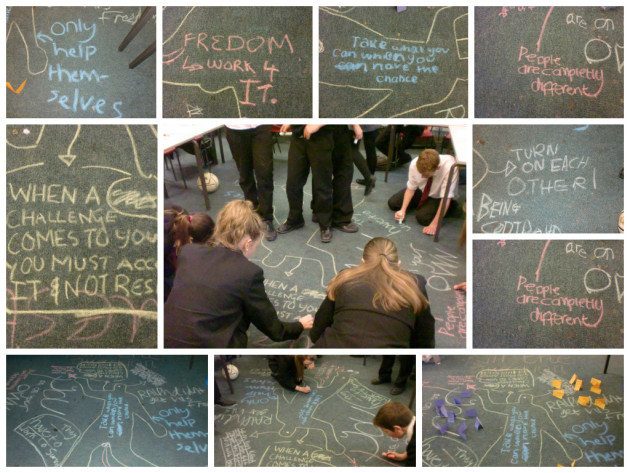
My year 9 students were studying Lord of the Flies and Battle Royale and we took the bold step of using chalk on the carpet in my classroom to create our debate bodies! Note – it did come off eventually, but only I after I scrubbed it…
The idea we killed this time was Malcolm X’s quote: “Nobody can give you freedom; nobody can give you equality or justice. If you are a man, you take it”.
This time students were given different colour evidence cards to represent a variety of approaches to this quote.
To begin I allowed students to write their “first response” to this idea on the carpet in chalk. Another learning point for me here: don’t even bother trying to discourage teenagers from making your dead body anatomically correct!. I was pleased and surprised that I got a full range of responses, not just what they thought I wanted to hear, but what they really thought.
After this, I put students into small groups and gave them each a non-fiction text that in some way added evidence to the idea. I had an in-depth article about the science of the murder gene, another on nature vs nurture, one on dictators and the world history of rebellion.
Students worked together reading this texts, summarising and annotating, then they chose evidence to support or oppose Malcolm X’s idea. Their evidence was placed on different colour cards and placed around the body.
We began to discuss it, we debated every piece of evidence we had gathered so far. Again the results were really encouraging, students were presenting real arguments using a variety of evidence. They had to acknowledge counter-arguments and justify their reasoning.
Finally, I have each student some green cards, I asked them to find evidence from either of the texts we were studying (most chose Lord of the Flies) or from the contextual evidence we had gathered about Golding and Takami. Again, we then together looked at each piece of evidence.
As a class, we weighed it against our own thinking, what we felt to be true and we created a collection we were happy with.
The additional end benefit of this entire activity was that my students had, in essence, planned out an essay. Our cards and debate record became a very detailed essay plan.

Pop Quiz! Which of these best fits you?
If you answered “me, me!” to any of these 4 statements, then today’s blog post is dedicated to you. Here are 3 engaging classroom activities that: give your students a chance to debate; challenge students to stretch classroom knowledge to become real world knowledge; and help them link history and literature with their lives!
It’s easy to forget that Guy Fawkes wasn’t the instigator of the Gunpowder Plot, the man and the money behind it was Robert Catesby. A wealthy farmer and Catholic, Catesby persuaded many of his friends that James I was a weak king and could be easily removed from power.
Guy Fawkes, however, was also not the bumbling fool often portrayed in cartoons. He fought in the Spanish wars against the Dutch Republic and was an experienced soldier.
If you and your students are interested in finding out more about Guy Fawkes and the Gunpowder plot – then check out my Guy Fawkes Hero or Villain resource on TpT.

After you have researched Guy Fawkes in detail, use these debate prompts (a sneak peek from above resource) to spark some deep discussion in your classroom.

**Now a big disclaimer is needed here: V for Vendetta is rated a 15 here in the UK. The whole film is not suitable for classroom use.**

How do I use the film in my lessons to help discuss Guy Fawkes then?
Introduce the story: V for Vendetta (1998) is a graphic novel by Alan Moore. The story is set in a dystopian future where the United Kingdom is ruled over by a neo-facist regime. One night, 5th November, a freedom fighter attempts a revolution. He takes over the national media and makes a speech encouraging all citizens to join him the following year (on 5th November) again to start a rebellion.
Watch the clip:
https://www.youtube.com/watch?v=KKvvOFIHs4k
Read the speech and discuss persuasion:
I have attached a file with V’s revolutionary speech here. We discuss rhetoric and persuasion here and compare it to other political speeches. Then we discuss V’s use of 5th November as a sign of positive revolution.
I pose the questions:
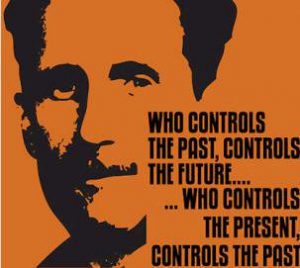
In his dystopian novel, 1984, Orwell writes, “who controls the past, control the future” – we discuss this and the truth of it in our world today.
If your students love V as much as mine do then I often let them watch these two extra clips: The 5th of November Overture and *spoiler* the finale scene (note this contains swears) and will also spoil the film for them – so beware!!
One of the best things about nursery rhymes is that they are all pretty gruesome in nature. If they aren’t warding off the plague, they are accusing you of being a witch. The nursery rhyme written for the ‘celebration’ of failed Gunpowder Plot is just as brutal. We study it for ‘historical accuracy’ and rhetorical techniques and then we create our own Gunpowder Plot nursery rhyme. Sometimes we cast Guy Fawkes as the hero. Sometimes a hapless fool deserted by his comrades. Sometimes we write about James and the Lords in Parliament. Occasionally we imagine the horror if it had succeeded. If all else fails – we create a visualization of the original rhyme with lots of gory detail.
Remember, remember the fifth of November,
Gunpowder treason and plot.
We see no reason
Why gunpowder treason
Should ever be forgot!
Guy Fawkes, guy, t’was his intent
To blow up king and parliament.
Three score barrels were laid below
To prove old England’s overthrow.
By god’s mercy he was catch’d
With a darkened lantern and burning match.
So, holler boys, holler boys, Let the bells ring.
Holler boys, holler boys, God save the king.
And what shall we do with him?
Burn him!
Check out this interactive Guy Fawkes game on the BBC History website. Go to the Powder Plot Game here.
If you wanted to get your students debating; brief history and literature into the real world and challenge your students to really think, then this post was for you.
Sign up below to receive regular emails from me jammed packed with ELA teaching tips, tricks and free resources. Also access my free resource library!
Revision is a tricky nut to crack, especially for literature students where the topics for revision are as wide ranging as quotations from the text to feminist readings to historical context.
Jenga Revision is just one of the ways I help student memorise everything they need to know.
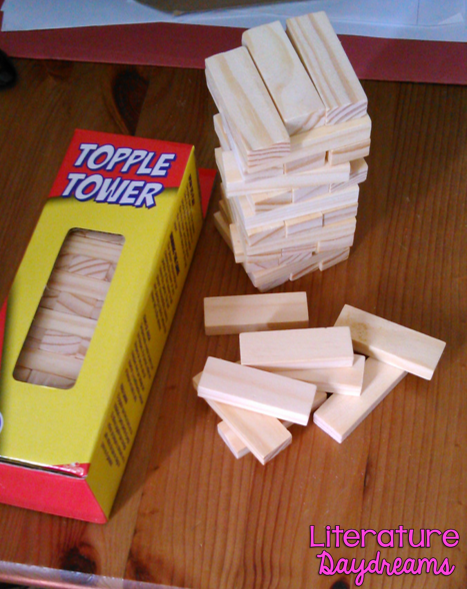
1. Get hold of your Jenga blocks (you will need felt tips as well)
The cheapest Jenga blocks I have found are these mini Topple Towers from Poundland. Just £1 each. The tower doesn’t stand much higher than 15cm. But that makes it perfect for small group work.
*Note – buy the cheapest ones you can – because these will be unfinished wood and easier to write on with felt tip!*
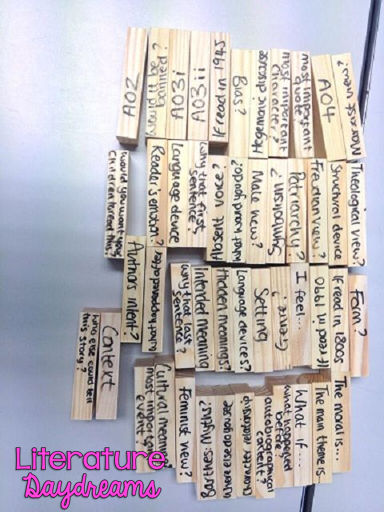
2. Decide what you are going to write on them.
When I started out using this activity, I was totally laid back about what went on the blocks. A few years on and I’m a little wiser. Here’s what I learnt:
Colour code the categories – so red for direct evidence from the text, blue for historical context, green for key literary terms.
Get students to plan / find the information first – no writing on the blocks until you’ve written it on paper (this can help avoid lots of repetition too)
Brevity rules! The blocks can only take 1 or 2 words – so precision is needed.
Neatly does it – some of those boys need to earn the right to write. Prove to me you can be legible, gentleman!


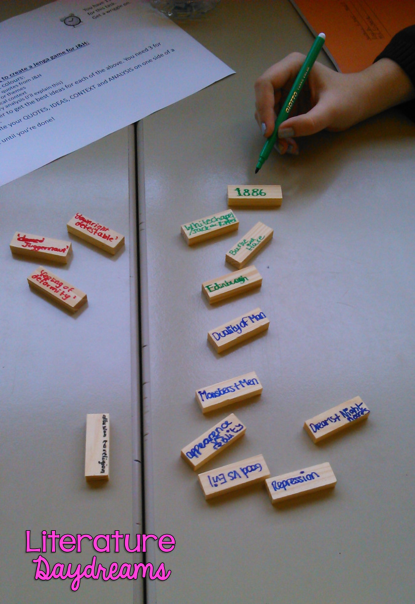
3. Get working on making the blocks. Depending on the number of texts to be revised, I will either allocate each group a different text or split the chapters or sections across a number of groups.
4. Get your game on. Here are the rules of the game.
# Choose who goes first (tallest, shortest – I don’t mind).
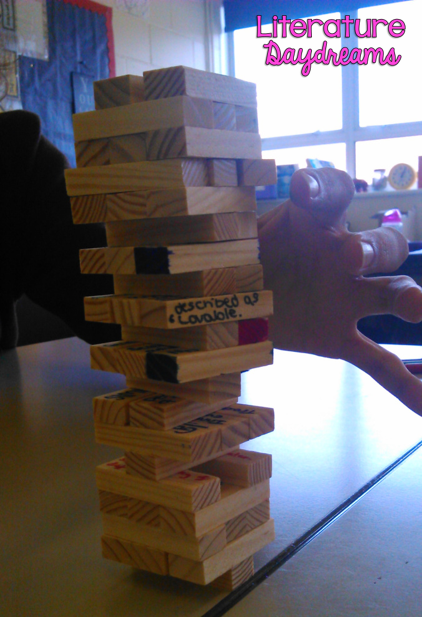
# Person number 1 pulls out a block and uses the information on it to ask a question of someone else in the group. For example – say the block has the name “Crooks” on it. The questioner could form any question that will give them the response Crooks. The harder the question, the better. Which character in Of Mice and Men has their own chapter? Who does Curley’s Wife threaten to string up? Which character in the novel reads a lot?
# If the response is correct, then the responder is given that block to start making their collection. They then take the next turn.
# If the response is incorrect, then the questioner keeps it (for their collection). And they keep taking turns and keeping blocks until someone answers correctly.
# The winner is the one who has the most blocks when the tower is completely gone. This encourages them to make the questions as difficult as possible.
And that my friends is how we play revision Jenga!
Thanks for reading.