Category Archives for "Teaching tip"
")
This review activity is super popular with my classes. So I thought I would share it here. It is so simple and fun that you can implement it with very little preparation at all!
Here’s how I came up with the idea:
A while ago I joked to a colleague that my year 11s knowledge of Animal Farm was just about enough to fill a stamp. I was joking, of course. However, this conversation did remind me of a good friend from my university days. Pete was (and is) an artist. He found great delight in being quirky and gauche and his best expression of this was the teeny-tiny notes left under my door, which needed a magnifying glass to be read.

I love using the tiny class review with my classes. Essentially, it has two review strategies rolled into one – summarising and questioning. The basic idea is that students summarise their learning onto a postcard… and then another student in the class has to respond in some way!

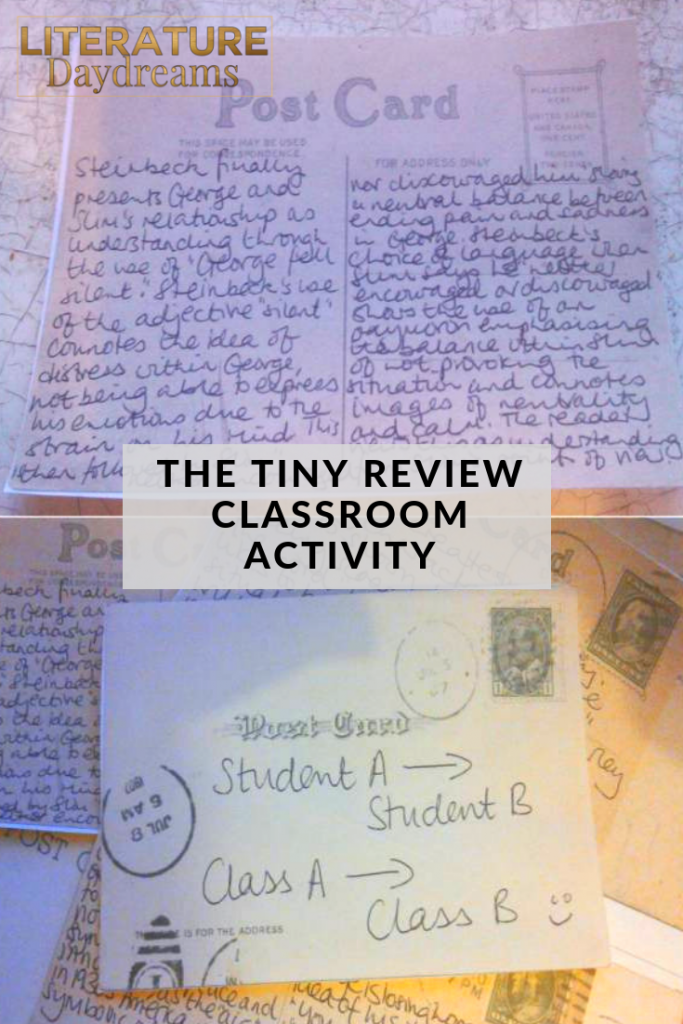
It’s the perfect activity for an end of the day lesson when writing what feels like an essay in books can be quite a challenge. You can use any postcards at all of course. Most of the time, I just use scrap paper that I’ve torn up into 4.
One unexpected benefit of this review activity was the competitive nature of my classes, when we started off writing these postcards, they just wrote them. Then after a while, we started seeing who could write 30 words on a card, then 40, then 50. In time, my students became ‘tiny writers’ (just like my friend Pete) and were squeezing up to 100 words squashed onto one postcard. Just imagine my delight!
Added to that, the competition aspect increased when I started using this as an inter-class challenge. My students all knew each other and although they didn’t sign their postcards, they got a kick out writing exceptionally hard questions for their peers in the other class. This upped-the-ante for each class during each session we used this idea. It became crazy after a while. A couple of years ago, we got so into this activity that we even made an inter-class postbox!
Drop me a comment below if you try these ideas out and let me know how they went!
If you are looking for other fun and engaging activities to use in your ELA classroom, why not check out these blog posts:
Also, each week I send an email out to my teacher-friends, in this message, I include one classroom activity (like the perfect review game) and one literature activity (like this blackout writing activity). These tasks are fun, engaging, and will create brilliant learning moments for your students. If you would like to receive this weekly email (I send it on a Sunday morning – ready to help stave off those Sunday scaries), then all you need to do is fill out the email sign up below!

Sign up below to receive regular emails from me jammed packed with ELA teaching tips, tricks and free resources. Also access my free resource library!

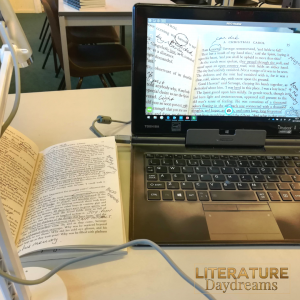
I have had a visualizer (document camera) in my classroom for a few years. I would use it once in a blue moon. Mostly to show the class something that I couldn’t copy. This year, I was thinking about how I could achieve 2 of my personal classroom targets. It turns out that my visualizer was the key to meeting both targets.
Quite a few of my classes contain groups of middle achievers, who have a tendency to sit in lessons not doing too much. They complete enough work to scrape by. They don’t cause trouble. They don’t answer questions. They are coasting. This year – I was going to change that. No more passive students!
I want to intentionally cut down on using paper in my classroom. As an English teacher, it feels like I do nothing but generate paper. Unfortunately, we have zero technology available, so that wasn’t an answer. I needed to find an alternate solution to the countless worksheets, printed articles, and practice tests I use.
This IPEVO* visualizer/document camera proved to be the unexpected key to my success. My very no-techy explanation of what a visualizer is: it’s a camera, that plugs into your computer USB port and you can manipulate to point at a book, sheet, or whatever on your desk. It then projects the image onto your computer screen and thus onto your classroom screen / interactive whiteboard.
Perhaps you have a visualizer knocking around your department, here are a few ways you can put it to good use. If you don’t own one – I can’t exaggerate enough how much I love mine.
UK link* https://amzn.to/2OorlJh
I ‘live annotate’ my literature texts with my class. All my classes have to do examination-style tests on their literature texts. It could be a 19th-century novel, Shakespeare, poetry – they are all tested by a cold extract exam. They don’t get their copy of the book with them. No notes. Just what is in their brain.
So they need a lot in their brains!
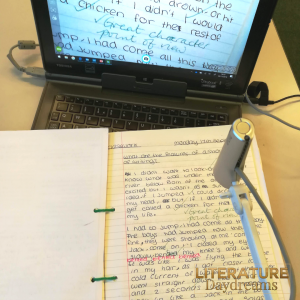
First up is ‘live annotation’. I essentially teach the skill of reading and annotating using my visualizer. I put my blank copy of the text under the camera and as we read, we annotate together. It might be comprehension details, word meaning, connotations, themes, or links to historical context.
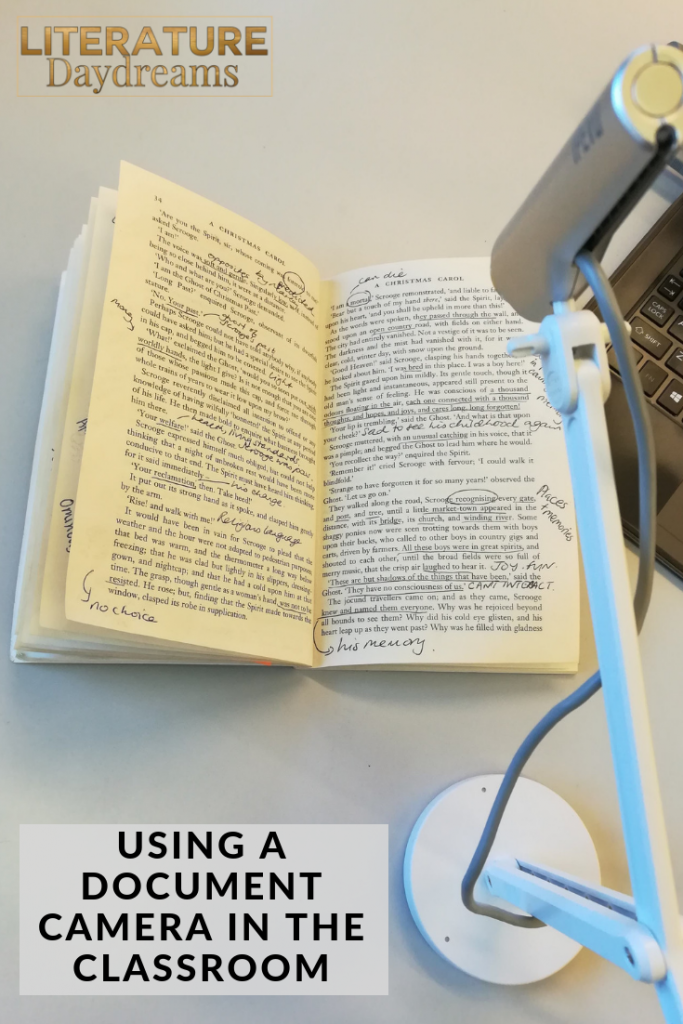
The unexpected upside for my coasting students was that this activity was so concrete and so easy at the beginning, that they got all the annotations down without even thinking about it. After all, at the beginning, all they were doing was copying.
As time passed, I asked more questions “what should we be annotating here?” and it felt much less like spoon-feeding my students. Everyone was so comfortable by then that they would be suggesting ideas. They had learned a skill which wouldn’t necessarily have come naturally to them!
I can’t tell you how many times I have printed and copied 30 blank table worksheet for my class to fill out. Just because I couldn’t be bothered to go through the hassle of explaining exactly how many columns and rows were needed. I admit it, I was lazy. I couldn’t deal with “I’ve run out of room!” or “It doesn’t fit in my column!”
Now I just use my visualizer to demonstrate exactly what I want the table to look like. I get a blank piece of paper, line it up under my visualizer, draw the first line – everyone copies – draw the next line. It probably takes about the same amount of time as handing out 30 sheets and getting them glued in books.
The secondary upside is my meager contribution to saving the planet by reducing copying!
In addition to my coasting students, I have a few classes that really struggle with English. Although these classes tend to be smaller and specialist, it is always hard for me to get around and spend time with every student.
I use my visualizer as a way to provide me with more 1-2-1 time with certain pupils. Let me give you an example: say we are covering the difference between showing and telling. We complete the first task together, on the visualizer (which means I can also model good handwriting etc). I leave the work on the screen, so my slower writers can take their time to write it down.

I can then circulate around the class to give individual support.
This works better than going through the work verbally because I don’t have to keep repeating myself.
It also works better than typing the work onto my screen / whiteboard because I can interact directly with the ideas – I can circle words, change them, highlight, put stars by things as I am explaining.
I’ve saved the best to last. This idea has made a huge difference to my students progress. I started ‘live marking’ in the same way that I did ‘live annotating’. My classes would complete a piece of creative writing or an essay. I would take responses from 4 – 5 volunteers and mark them live using the visualizer.
Let me break it down for you: say you wanted to work on thesis statements. I would ‘live mark’ those 4 – 5 pieces of work by placing them under the visualizer and looking at just the thesis statements. We would work out together which were the strongest, how to identify the weaknesses, and how to improve any that needed improvement. The rest of the class would then look at their own thesis statements and self-assess.
These are just a few ways that I use a visualizer in my classroom!
Leave a message in the comments if you use a visualizer. I’d love to find even more ways to use it in my classroom!
*These links are affiliate links, you don’t pay any more or any less by using this link. It does mean I get a small commission – which helps keep me in cups of tea!

This review game is perfect to help your students demonstrate their learning for any literature text. You can use it while reading a text or after reading to have your students prove their learning.
In this blog post, I’ll show you:
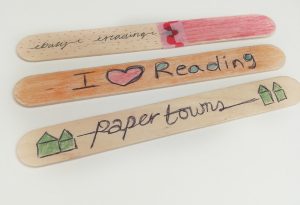
The basic idea is that students build a card tower. The catch is that each card on their card tower has to demonstrate their knowledge of the ideas, characters, and the plot of a text.
It would be too simple to build a card tower with just information on it. Nope – that’s not enough for us. Here’s what the key to the challenge is: Each card has a sticky note with information on it. But each sticky note has to link to every other sticky that it touches in the tower.
In the image below, each card in lower zigzag pattern touches. The cards that touch either at the top of the V or at the bottom of the V have to have information on that connects.
So the sticky that we can see on the lower level states “Macbeth does not experience guilt”. This means that the card propped up against it must link to that idea. Perhaps with a quotation that proves this, or a reference to an event that links to this idea.
Even more challenging – the cards that make the horizontal support across the lower level also have to contain facts and information that link the ideas on the cards!

The overwhelming benefit of this game is that students have to think and think hard about all the ideas they wish to demonstrate before they try and construct their card tower. The tower itself becomes secondary to their knowledge and learning.
As this is a literature review game. So your students will need to know about your text. It is essentially a 3D game of dominoes. Here are the instructions I give to my students:
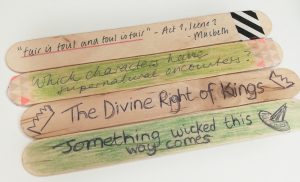
The first time I use this review game, students get all caught up with what is and isn’t allowed. So I give them this example. Here’s is what a sticky notes series might look like from Macbeth Act 1, Sc 1:
Plot – Macbeth fights bravely against rebels trying to overthrow King Duncan –
which links to – Character – Macbeth is shown to be bloodthirsty and violent from the outset – which links to – Theme – The theme of rebellion is introduced as Macbeth is given the rebel’s thaneship – which links to…plot! But this time because the theme is rebellion – you could include anything from the plot on rebellion!

[social_warfare]
Sign up below to receive regular emails from me jammed packed with ELA teaching tips, tricks and free resources. Also access my free resource library!
")
If you are looking to liven up your creative writing teaching or your students need some fresh ideas to improve and develop their creative writing in class – then this blog post is for you!
Below are 5 of my favourite ways to mix things up a little when I am teaching creative writing!
These writing prompts focus on s-l-o-w writing. Slow writing is the opposite of a quick write. The idea is to write slowly, precisely, carefully, selecting each word intentionally. Slow writing can take 5 minutes with one sentence and 30 minutes with a paragraph.
This writing task is all about describing the same setting at three different points during the day. You can use different settings, for example, I sometimes use the grounds at my school.
I use these 3 prompts in different ways. Sometimes I do gradual writing with students and they write each one, in turn, changing – shaping – adapting their own funfair as the day passes.
Another way is to put your students into triad groups and have them write one each. They can then share and improve based on the best bits of each other’s writing.
I love to use open lines as a writing activity with my classes because it always amazes me where students will go with the same opening. You could give them one line and end up with 30 completely unconnected stories.
Below are the 3 opening lines that I found to create an excellent and diverse range of stories:
I started teaching Khaled Hosseini’s A Thousand Splendid Suns this week and it is a joy, an absolute joy to get stuck into such a beautiful piece of writing.
Re-reading the opening, I am always reminded of how much our landscapes shape who we are. Let me transport you for a moment. If you don’t know the novel, a shunned woman and her illegitimate daughter are sent to live in a shack isolated in the countryside of Afghanistan.
Here is Hosseini’s description: It was on the outskirts of Gul Daman. To get to it, one took a rutted, uphill dirt track that branched off the main road between Herat and Gul Duman. The track was flanked on either side by knee-high grass and speckles of white and bright yellow flowers. The track snaked uphill and led to a flat field where poplars and cottonwoods soared and wild bushes grew in clusters.
I love how Hosseini highlights their isolation, the mother’s ‘off track’ actions, the ‘uphill’ life they lead, and a hundred other details in his description.
It would make a great mentor text example for a piece of descriptive writing. For example: create a description of the landscape of where you live, the nature rather than the buildings. BUT as you describe it, give the details in the landscape significance to show something about your own life experience.
*I send emails with teaching tips, tricks, and free resources to my subscribers regularly. I value your privacy and you can learn more about how I handle your data in our private policy. You can unsubscribe at any time.

Do your students just l-o-v-e writing spooky stories? My students cannot get enough of creative writing around this time of year. But if I’m honest, real talk here, some of their story ideas can be a little bit immature, a little bit samey. Sometimes I feel like they are doing their own versions of some of ‘those’ films. Does this happen in your classroom?
Today, I am going to let you in on my strategy for pushing students towards originality in their own writing. *Yes! Happy Dance!* The strategy: don’t use story prompts; use story starters.
A story prompt sets up a premise for a narrative. Generally a prompt sets up who the main character is and what the setting is, it might also prompt the key event. It would read something like “a student is walking home late at night, they become afraid”. You can see how 30+ really different students, might come up with 30+ really similar ideas with this prompt. You can imagine it now can’t you? The student hears noises, they look behind them and see nothing, they run, something / someone grabs them… it turns out to be a) an axe murderer, b) one of the parents, or c) a friend.
But a story starter. That’s different. A story starter provides the first line or couple of lines of a story. Something like “The phone rang. The door slammed.” You can see already that this story starter doesn’t provide the writer with any information, or least only a teeny bit. Enough to get the brain whirring. But not so much that it confines writers in the space of predictability.
This week I shared with my subscriber list “20 story starters” that are perfect for Halloween. Today I am going to share 10 with you right here!
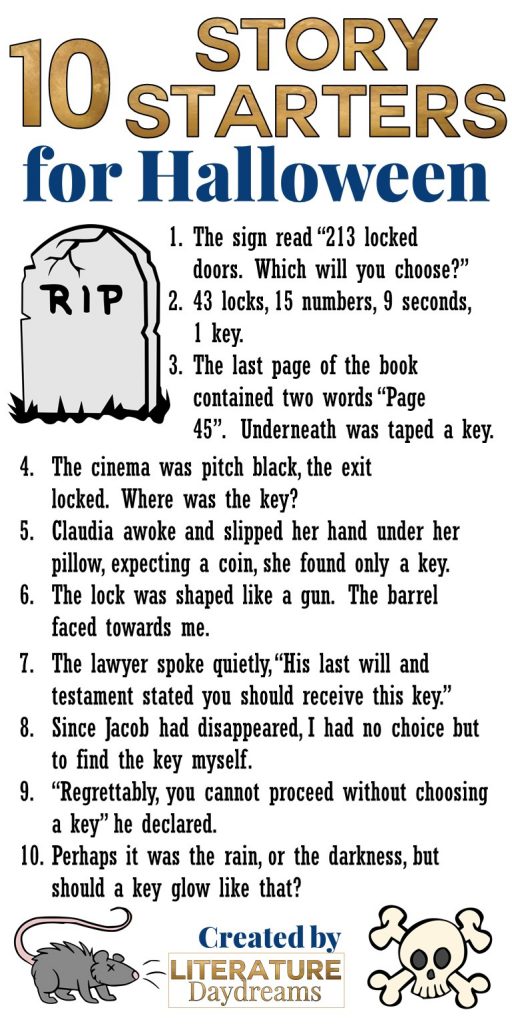
Love them? Me too. I surely hope you can use them in your classroom. As part of your daily writing, or perhaps as part of your creative writing unit, or as a Halloween special.
If you think these writing prompts are JUST what you need, then this is for you. To save you time, to help claim back a tiny bit of ‘your life’ I have created 20 pages of Halloween story starters and 20 pages of writing instruction that is ready to print and go!

This ready-to-go resource contains 40 pages of Halloween writing activities. The story starters are totally fresh and new. No repeats. Each page is beautifully designed. In addition to these new story starters, each one comes with a page of planning, techniques and new vocabulary to help your students nail their spooky stories! This resource is available both as a >>>paper version<<< and as a >>>Google Drive digital edition<<<.

*I send emails with teaching tips, tricks, and free resources to my subscribers regularly. I value your privacy and you can learn more about how I handle your data in our private policy. You can unsubscribe at any time.
*I send emails with teaching tips, tricks, and free resources to my subscribers regularly. I value your privacy and you can learn more about how I handle your data in our private policy. You can unsubscribe at any time.

http://www.youtube.com/watch?v=eRVm_TAE24A
(Errr – don’t watch this if swearing offends you).
I’m from a very religious family. My step-dad is a former RAF Chaplain (and served in the Falkland Islands) and is now an itinerant vicar (which is not the same as what George and Lennie were); my brother is a vicar. I grew up steeped in religious tradition – from churches were the communion wine is golden to ones where they play guitars and dance. I am enduringly grateful for my upbringing. Not least when it comes to teaching literature. You see – I can spot a biblical allusion at 50 paces.
*The purpose of this introduction is to contextualise some of mild irreverence below.*
Have no clue about the Bible and why should they? Yet, this absence of knowledge results in pupils often struggling to identify and understand many of the deep running threads in literature.

I often describe the need for deep subject knowledge as being like a tapestry – it is complex and interwoven, creating an overarching picture with mini-scenes within. Threads are drawn upon as needed but always remain embedded in and attached to the big picture.
Yet – if this tapestry is English literature – then much of what we study (if not all) was written in a time when religion and religious ideologies were key to moral and ethical outlook, social norms, thoughts on the creation of wealth, and society, and even the nature of life and death itself. Rightly or wrongly identity itself, for much of history, was shaped by religion.

Some may disagree – but I would argue that religion was the predominant ideology of English Literature right up until World War I.
Thus over 700 years of written literature is interwoven into a tapestry where life and religion were twisted threads.
Therefore, to study, understand, and enjoy literature – knowledge of religion and the religious texts, such as the Bible, is essential.
It’s easy, as with all things historical context based, to bolt this knowledge onto a unit of work.
You’re teaching Great Expectations – you paraphrase the parable of the Prodigal Son.
The Lord of the Flies – well, that’s just one big Biblical allusion, although you could just summarise beginning of Genesis and then skip to the New Testament…
The Handmaid’s Tale – same.
Whilst this approach works for individual texts, it doesn’t allow students to develop an overall bank of knowledge that they can rely on. It robs them of the cultural knowledge that is part of our history, as well as our literature.
I like what ED Hirsch has to say in The Dictionary of Cultural Literacy (this is an affiliate link!):
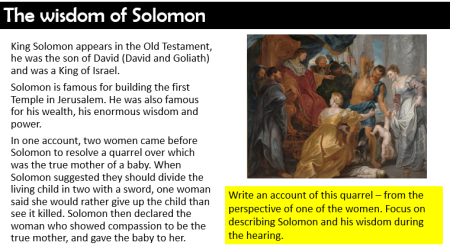
No one in the English-speaking world can be considered literate without a basic knowledge of the Bible. … All educated speakers of American English need to understand what is meant when someone describes a contest as being between David and Goliath, or whether a person who has the “wisdom of Solomon” is wise or foolish, or whether saying “My cup runneth over” means the person feels fortunate or unfortunate. Those who cannot understand such allusions cannot fully participate in literate English.
Religious imagery (both positive and negative) pervades culture still. By only teaching what is needed to tackle one text, we are not weaving the tapestry.
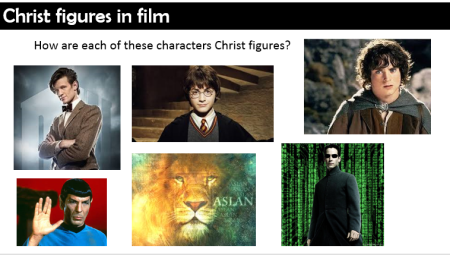
My long-term goal is to create specific units of work that study ‘allusion’ in KS3, knowledge units that study Biblical knowledge as well as mythology from Greek, Roman, English heritage. Not just studying the stories but also studying representations of these stories, characters, and ideas throughout literature.
At the moment, I teach these as explicit, out-of-context starters in year 9. Whilst I am aware this isn’t ideal – I do feel that some knowledge is better than none, for now.
Here’s the list of biblical characters and stories that I teach, with some examples below:
Also because Biblical allusion, among other things, is tested under the AP Literature curriculum – there are loads of fabulous sites that have lists of biblical phrases etc. I like this PDF because it has a bunch of useful literary, biblical and historical allusions.
What to test your knowledge of Biblical reference and allusion? Have a go at this BBC quiz!
Sign up below to receive regular emails from me jammed packed with ELA teaching tips, tricks and free resources. Also access my free resource library!

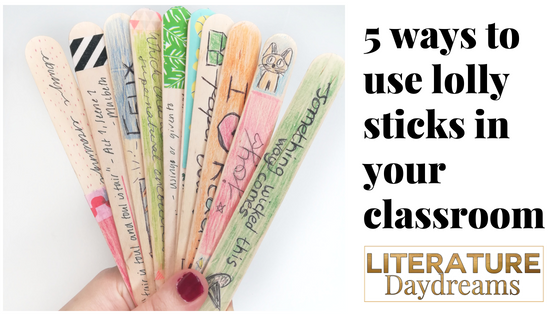
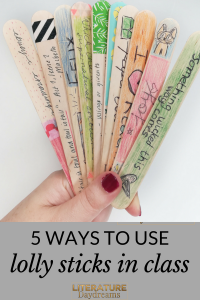
If you’re anything like me, you have drawers or even cupboards of things you have bought for your classroom – just in case. I have about one hundred thousand lolly sticks*. Over the last year, I worked hard to use all-the-things. In the post, I am going to share 5 ways you can use all those lolly sticks in your secondary classroom!
Lolly sticks originally made their way into our classroom as a form of assessment. We wrote our students names on them. Then used them as a simple, low-tech random name generator. Well, they are still great for that purpose. You don’t necessarily need to use them as part of your questioning strategy every lesson. But mix things up using them every now and again.
Hand out the lolly sticks to students at the beginning of the year. Set them a homework to decorate their lolly stick with their name and at least 2 images that show me something about their personality.
I stick them in a cup at the front my room and use them to:
So don’t discount using your lolly sticks for names still!
Another way I use lolly sticks is as bookmarks for our class novels. We generally don’t have enough copies of our class novels to allow students to sign them out and take them home. In fact, often our teachers are sharing class sets of novels between and we have to juggle who is using the books during hour 1, hour 2 etc. I also don’t see my classes every day. In fact, some of my classes are one hour a week classes and I don’t see them except for that one hour.
So, bookmarks are one of the things that make my reading teaching easier. I used to use post-it notes and to be honest that was fine. But my lolly stick bookmarks have a two-fold purpose: they make a great bookmark and they can be used as a reading ruler.
It’s an easy and effective way to keep everyone on track. No issues with different page numbers in different editions of the novel and an easy differentiation tool.
I also use them the most for extending and developing student responses to literature texts. Let’s take Macbeth for example. At some point early on in studying the text, I will hand out my unused lolly sticks to the students and ask them to write on them the names of characters, events, settings, themes, and relevant historical context facts. Once I have these I use them in a number of ways:
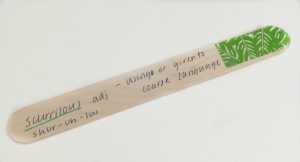
To take this further, I then start adding lolly sticks with key literary terms on (foreshadowing), with text-specific language (sycophant for example from Macbeth), or with essay writing challenge sentence starters (e.g. another way this could be interpreted is…).
By the end of studying a literature text, I normally have about 150+ lolly sticks to use for any number of quick quizzes, revision tasks, or extension ideas. Even better, when I move onto a new text but want to spiral back to review Macbeth (for example) then I can just grab a lolly stick and ask the class a question.
Idea 4 is one that I use throughout the year and I use across multiple classes. Simply, anytime we find a new vocabulary word that we love (last year one class was obsessed with the word incredulous), we write it onto 2 – 3 lolly sticks and put them in our vocabulary post.
The final idea for using up all those lolly sticks is to create puzzles for your students to solve. These are great ice-breakers, quick fixes for when you need 5 minutes, or discussion prompts.
Here’s what I do:

I hope you enjoy using these ideas!
*This post contains affiliate links. If you buy something using one of these links, you won’t pay any more but I will receive a small commission!
Sign up below to receive regular emails from me jammed packed with ELA teaching tips, tricks and free resources. Also access my free resource library!

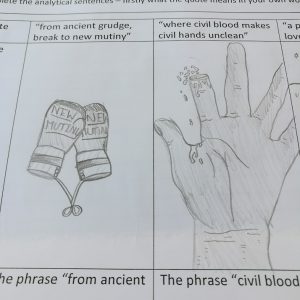
Helping students engage with and understand literature before they read is essential. One way to take the fear away from old-fashioned language or writing that is unfamiliar is to let students play with it before you read.
This pre-reading activity is deceptively simple. Here’s what you do:

It always amazes me how varied, interesting, and deep my students’ interpretations of these words are. Remember they have no idea what they are going to be reading. Yet students are able to see the depth in the language so much more easily when they only have a handful of words to deal with.
Here are a few examples of my student’s work: from Romeo and Juliet and the task above on The Drum!
If you try using this activity with your class, drop me a note in the comments to let me know how it went! You can see all my Literature resources here.
Sign up below to receive regular emails from me jammed packed with ELA teaching tips, tricks and free resources. Also access my free resource library!

Writers can never get enough opportunities to write more detail. We live in the cracks on the pavement and the blank spaces between letters. Here are 3 quick writing activities that you can set your students to help them improve description and descriptive writing.
Here’s a quick-write task you can to practise the skill of ‘finding all the details‘. Choose one room in your house and list everything that can be: seen, smelt, heard, felt (and tasted). Write 100 words describing this room using only sensory imagery. When you have finished writing, ask yourself this question – were you able to create a sense of the room with this tightly controlled word count? If not, consider why? Look at your nouns and adjectives, are they specific and precise? Did you waste words? Make just 5 changes and see if this improves your writing.
Description isn’t always just about giving an accurate observation of something. Sometimes it’s about seeing it deeply. Perhaps we need to look into the heart of things before we can describe them well. Use these quick-write tasks to practise this skill:
Slow writing is the opposite of quick writing and quick writes. The idea is to write slowly, precisely, carefully, selecting each word intentionally. Slow writing can take 5 minutes with one sentence and 30 minutes with a paragraph.
Imagine this scene: It is sunset and you are waiting for your friends, who are late. Describe the setting as the day moves towards darkness.
So how can you slow your writing down? you are waiting, probably bored, perhaps a bit annoyed. Now,
s-l-o-w your writing down, exactly like time seems to have slowed down while you are waiting. Walk your reader through the tick, tick, tick of your watch as you wait.
If you enjoyed these writing tasks and prompts then you should check out my writing prompt sets on TeachersPayTeachers. You can find them here.


Pop Quiz! Which of these best fits you?
If you answered “me, me!” to any of these 4 statements, then today’s blog post is dedicated to you. Here are 3 engaging classroom activities that: give your students a chance to debate; challenge students to stretch classroom knowledge to become real world knowledge; and help them link history and literature with their lives!
It’s easy to forget that Guy Fawkes wasn’t the instigator of the Gunpowder Plot, the man and the money behind it was Robert Catesby. A wealthy farmer and Catholic, Catesby persuaded many of his friends that James I was a weak king and could be easily removed from power.
Guy Fawkes, however, was also not the bumbling fool often portrayed in cartoons. He fought in the Spanish wars against the Dutch Republic and was an experienced soldier.
If you and your students are interested in finding out more about Guy Fawkes and the Gunpowder plot – then check out my Guy Fawkes Hero or Villain resource on TpT.

After you have researched Guy Fawkes in detail, use these debate prompts (a sneak peek from above resource) to spark some deep discussion in your classroom.

**Now a big disclaimer is needed here: V for Vendetta is rated a 15 here in the UK. The whole film is not suitable for classroom use.**
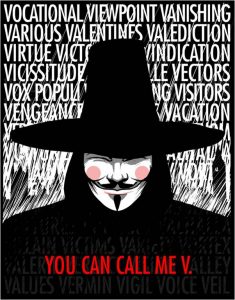
How do I use the film in my lessons to help discuss Guy Fawkes then?
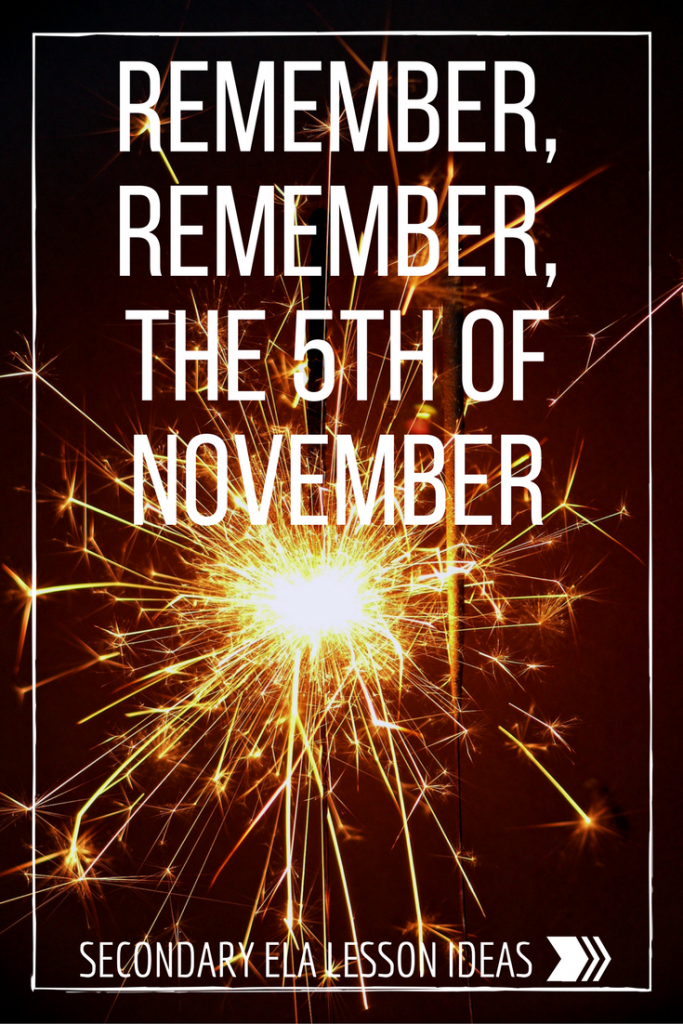
Introduce the story: V for Vendetta (1998) is a graphic novel by Alan Moore. The story is set in a dystopian future where the United Kingdom is ruled over by a neo-facist regime. One night, 5th November, a freedom fighter attempts a revolution. He takes over the national media and makes a speech encouraging all citizens to join him the following year (on 5th November) again to start a rebellion.
Watch the clip:
https://www.youtube.com/watch?v=KKvvOFIHs4k
Read the speech and discuss persuasion:
I have attached a file with V’s revolutionary speech here. We discuss rhetoric and persuasion here and compare it to other political speeches. Then we discuss V’s use of 5th November as a sign of positive revolution.
I pose the questions:
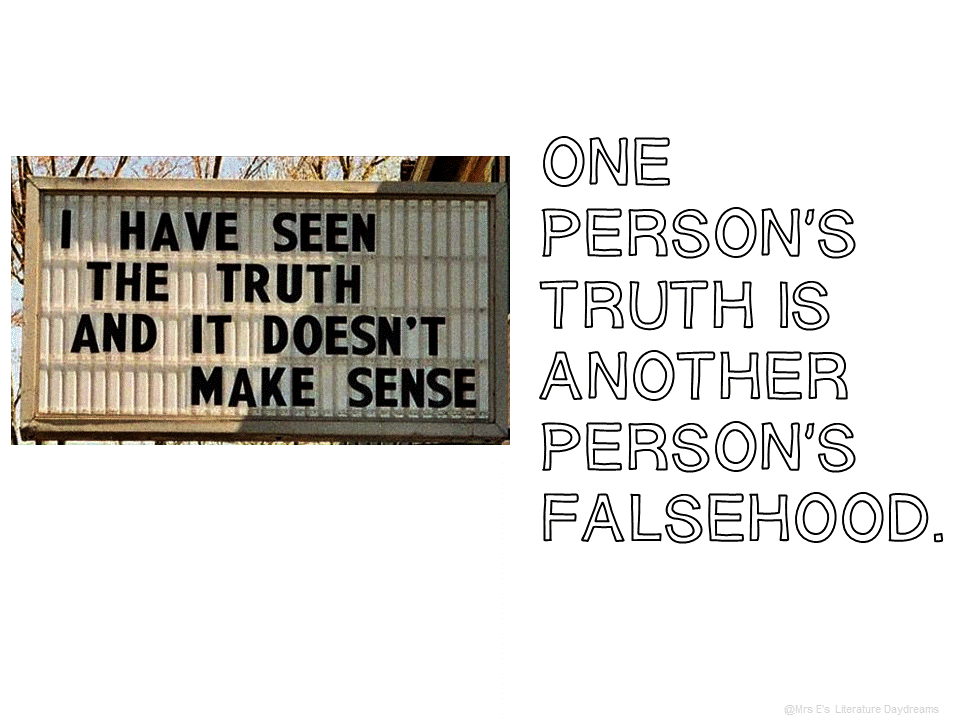
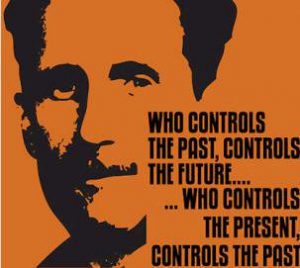
In his dystopian novel, 1984, Orwell writes, “who controls the past, control the future” – we discuss this and the truth of it in our world today.
If your students love V as much as mine do then I often let them watch these two extra clips: The 5th of November Overture and *spoiler* the finale scene (note this contains swears) and will also spoil the film for them – so beware!!
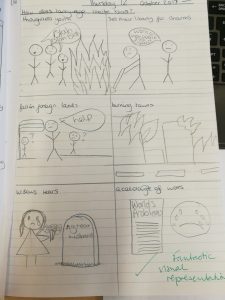
One of the best things about nursery rhymes is that they are all pretty gruesome in nature. If they aren’t warding off the plague, they are accusing you of being a witch. The nursery rhyme written for the ‘celebration’ of failed Gunpowder Plot is just as brutal. We study it for ‘historical accuracy’ and rhetorical techniques and then we create our own Gunpowder Plot nursery rhyme. Sometimes we cast Guy Fawkes as the hero. Sometimes a hapless fool deserted by his comrades. Sometimes we write about James and the Lords in Parliament. Occasionally we imagine the horror if it had succeeded. If all else fails – we create a visualization of the original rhyme with lots of gory detail.
Remember, remember the fifth of November,
Gunpowder treason and plot.
We see no reason
Why gunpowder treason
Should ever be forgot!
Guy Fawkes, guy, t’was his intent
To blow up king and parliament.
Three score barrels were laid below
To prove old England’s overthrow.
By god’s mercy he was catch’d
With a darkened lantern and burning match.
So, holler boys, holler boys, Let the bells ring.
Holler boys, holler boys, God save the king.
And what shall we do with him?
Burn him!
Check out this interactive Guy Fawkes game on the BBC History website. Go to the Powder Plot Game here.
If you wanted to get your students debating; brief history and literature into the real world and challenge your students to really think, then this post was for you.
Sign up below to receive regular emails from me jammed packed with ELA teaching tips, tricks and free resources. Also access my free resource library!